| PLANT NAME | |
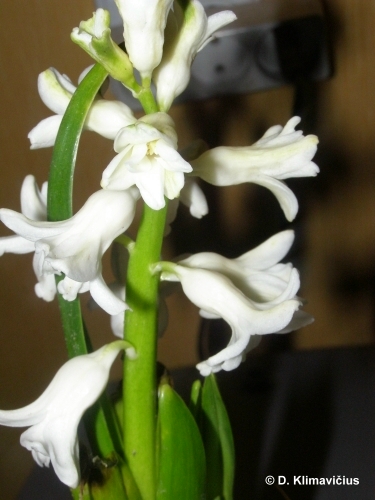
| Lithuanian plant name | Rytinis hiacintas |
|---|
| Latin plant name | Hyacinthus orientalis L. |
|---|
| English plant name | Spring Snowflake |
|---|
| TYPE OF PARTERRE | - Combination with woody plants
|
| ASSORTMENT | main |
| GROWING PLACE CHARACTERISTICS | |
| Soil | |
|---|
| Lighting | |
|---|
| Spacing, cm | From 10 to 15 |
|---|
| PLANT HEIGHT AND HABITUS | |
| Height | - very short (foreground plants) – till 20 cm height
|
|---|
| Habitus | flower with non-expressive habitus, for background |
|---|
| PLANTS ORNAMENTALITY | |
| Leaf color | |
|---|
| Blossom color | |
|---|
| Blooming time | - early spring - March - April First Decade
- spring - April Second Decade - June First Decade
|
|---|
| Blooming period | 1 month |
|---|
| General ornamentality | average decorative |
|---|
| Ornamentality duration, months | 3 |
|---|
| Group | intermediate type perennial (grown 5-6 years) |
|---|
| Bioecological group | Bulbous and corm |
|---|
| PLANT PROPAGATION | |
| The propagation of Hyacinth bulbs is relatively straightforward and perhaps one the easiest plants to practice with. All hyacinths can be raised from seed with species plants from this family almost always growing true to the type, flowering within two or three years. Unfortunately, due to their hybridization, the fancy ‘large flowered’ cultivars generally won’t grow true to the type and you will need to wait from three to six years for seedlings to flower before you can find it out. During the hyacinths annual growth cycle apical buds will develop at the base of the parent bulb, but as the main bulb grows larger with each passing year it becomes the central store for carbohydrates and plant nutrients. This parental dominance will reduce its natural propagation by offset bulbs compared to other bulb families. If a significant number of new bulbs are required then the technique of scoring can be implemented to help to improve offset bulb initiation.
This scoring process involves making two cuts at right angles through the bulbs basal plate. In larger bulbs, four equally spaced cuts may be required. Using a sharp knife, make each cut to a depth of about 5 mm then once complete allow the scored bulb to stand in a warm environment, at approximately 21 degrees Celsius for 24 hours. This allows the cuts to open which can subsequently be treated with a dusting of fungicide to prevent rots from developing. Set the bulb upside down on either a raised wire mesh or a tray of dry sand, then place it back into a temperature of 21 degrees Celsius as this will encourage callusing which also helps to prevent infection from rots. Keep the bulb as dry as possible without the bulb actually drying out. When resting on sand you may wish to dampen it occasionally.
Within three months new bulblets will develop on the cut surfaces. You can now plant the parent bulb into a pot, but again it will need to be placed upside with the new bulbs just below the surface of the compost. In March the pot can be taken outside for hardening off. These new bulbs will begin to grow properly now producing leaves while the parent bulb slowly disintegrates as carbohydrates and nutrients transfer to its progeny. At the end of the season lift and separate the bulblets and replant. Bulbs produced this way usually only need to be grown on for a further two years before they are mature enough to start flowering. |